
Installing a mobile CB radio takes most people 1 to 3 hours and comes down to five core steps: mount the radio, run the coax cable, connect to power, mount and connect the antenna, and finally test and tune your SWR. No license is required to operate a CB radio in the U.S., and the whole job can be done with basic hand tools.
Whether you drive a pickup, a Jeep, or a semi, a properly installed CB radio keeps you connected when cell service can’t. Truckers rely on it for real-time traffic updates, off-roaders use it when trails knock out signal entirely, and plenty of drivers just like having a way to reach other travelers nearby. The install itself isn’t complicated, but doing it right the first time saves you from chasing static, weak transmissions, or a radio that just doesn’t work well later.
This guide walks you through every step — from choosing the right gear to tuning your antenna for optimal performance.
What You’ll Need Before You Start
Gather these parts and tools so you’re not stopping mid-install to run to the hardware store:
- A CB radio unit (mobile type)
- A CB antenna matched to your vehicle type
- An antenna mount (magnetic, mirror, or permanent/roof)
- Coax cable to connect the antenna to the radio
- A power cord with an inline fuse
- An SWR meter for tuning
- Basic hand tools: screwdriver, wrench or socket set, wire cutters and strippers
- A drill, if you’re going with a permanent mount
Time needed: 1 to 3 hours for a first-time install.
Target SWR: 1.5:1 or lower is ideal; stay under 3:1.
Step 1: Choose the Right Radio and Antenna
Picking Your CB Radio
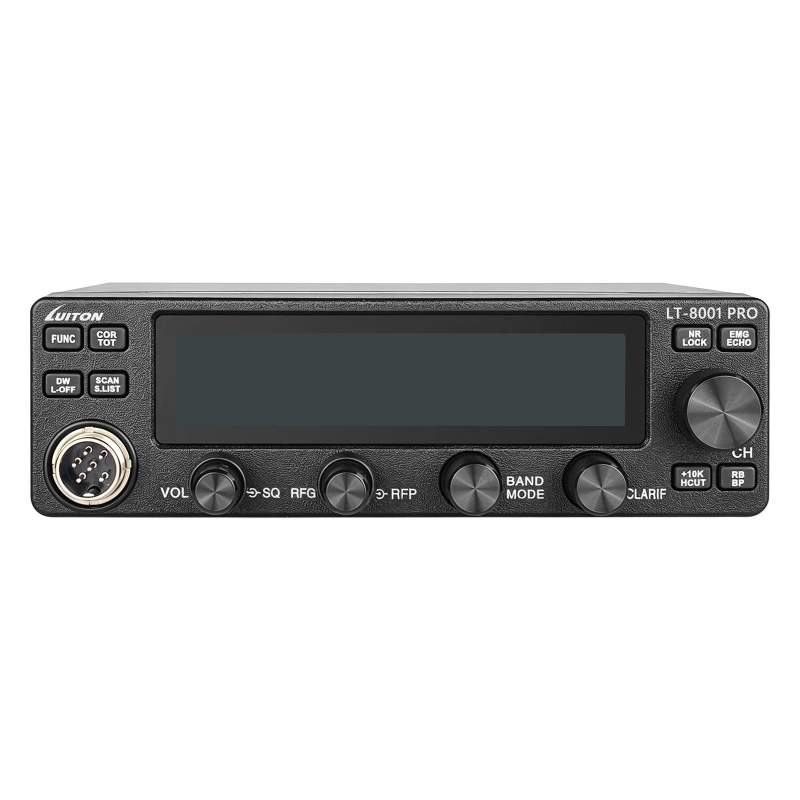
Your radio unit is the heart of the setup, and picking one that fits your budget and how you’ll use it makes everything downstream easier. Consider features like NOAA weather channels, a built-in SWR meter, noise blankers, and RF gain controls — all of which affect your day-to-day experience on the road.
If you’re looking for a full-featured mobile unit, the LUITON LT-8001PRO is worth a close look. It delivers 40W PEP on AM/FM/SSB, features a large 4.25″ color display, and includes dual DSP + AI noise filtering for crystal-clear audio even in noisy environments-. It also comes with a clarifier, VOX, ECHO, HI CUT filter, Dual Watch, and SWR protection — features that typically cost significantly more in competing units. For truckers and serious operators who want modern technology on a classic platform, the LT-8001PRO is a strong choice.
Choosing an Antenna
The most important antenna consideration is length. The longer the antenna, the better range you’ll get. An 8-foot antenna delivers the best range, but not many people are willing to use one. Our recommendation: buy the longest antenna you’re willing to use.
Mounting height matters just as much. The higher the antenna, the better the range. The ideal mounting location is the center of the roof, though not everyone likes that spot. Common alternatives include trunk lid, side mirrors, and bumper mounts.
Popular mount types:
- Roof mount (magnetic): Easy to remove, no drilling required
- Trunk mount: Clamps to the trunk lid edge, no drilling
- Mirror mount: Requires metal mirror brackets (not plastic)
- Bumper mount: Requires drilling
- Glass mount: Looks nice but gets poor range
Step 2: Plan Your Installation and Mount the Radio
Decide on Mounting Locations
Before drilling anything, plan where the radio, antenna, and wire routing will go. Consider accessibility — you need to be able to reach the controls while driving, and the radio should be positioned so you can see the display without taking your eyes off the road for too long.
Under-dash mounting is the most common choice for mobile CB radios. Most radios come with a bracket for this purpose. Hold the radio with the mounting bracket in the exact desired location, then use the bracket as a template to mark screw holes. If there’s no interference, drill the holes and secure the bracket.
If space is at a premium in your vehicle, consider a compact unit or a handheld CB radio as a backup. A handheld like the Quansheng UV-K5 is an excellent secondary option — it’s a 5W handheld transceiver covering 2m, 70cm, and 1.5m bands with a wide receive range of 50-600MHz-. Keep one in your glovebox for quick access when you’re out of the vehicle or need a portable option.
Secure the Mounting Bracket
One of the most important aspects of installing a mobile radio is securing the mounting bracket at the selected mounting location-. The mounting must be mechanically strong and conveniently located. A shaky or poorly secured bracket will cause the radio to rattle and can even affect the coax connection over time.
Step 3: Run the Coax Cable
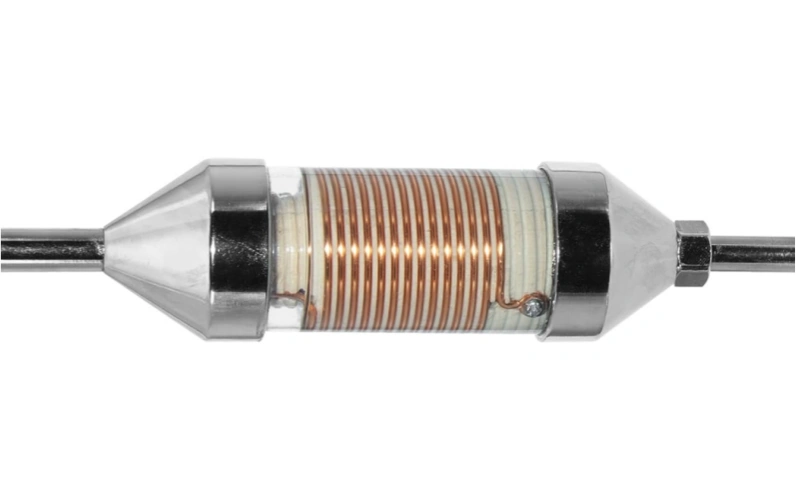
This is the step most people underestimate. The coax cable between your CB radio and antenna is easy to overlook because it usually disappears behind trim, under a seat, or along a bed rail — but routing it correctly is critical-.
Key coax routing rules:
- Install your antenna mount first. This determines the coax routing path, so mount the antenna before running any cable-.
- Avoid sharp bends and pinch points. The cable should avoid hinges, door seals that crush it, seat rails, sharp sheet-metal edges, hot exhaust parts, and cargo areas where it can be pinched-.
- Keep it away from the engine control module (ECM). Keep the antenna feeder more than 20 cm (7.9 in.) away from the ECM and its wire harnesses. Do not run the antenna feeder parallel with other wire harnesses-.
- Run coax along the frame rail, not through the engine bay. Every inch of coax you run next to a high-current wire picks up noise-.
- Leave a service loop at both ends. This gives you slack for future adjustments and prevents strain on the connectors.
Check that all connections are tight, but don’t overdo it — excessive force can damage the connector threads.
Step 4: Connect to Power
Wire Directly to the Battery
The best practice for CB radio power is to run dedicated wires directly from the battery. This provides a steady power source and reduces noise interference. Tapping into the fuse block is not the same as connecting to the battery — the wiring in the fuse block is bundled with other vehicle wiring, which can introduce interference-.
Power wiring best practices:
- Run dedicated 18-gauge wire from the fuse box to a switched accessory circuit-.
- Install an inline fuse within 18 inches of the battery terminal on the positive lead-. A 5-amp inline fuse is standard for most mobile CB radios.
- Connect both positive and negative lines to keep things safe.
- Ground the radio to the vehicle body. Be sure to ground the radio to the vehicle body for proper operation-.
Why This Matters for Your Radio Choice
The LUITON LT-8001PRO draws 12.6V DC ±10% with less than 6A consumption-. This means a properly installed power circuit with a 5-amp inline fuse is more than adequate to handle the radio’s demands. Its built-in SWR protection adds an extra layer of safety — if your antenna system has a problem, the radio will warn you before any damage occurs.
Step 5: Mount and Connect the Antenna
Grounding Is Everything
Proper grounding is the single most important factor in antenna performance. A shaky or poorly grounded mount will throw off your SWR readings before you even get to tuning-.
Grounding best practices:
- Run a wire from the antenna mount to the chassis of the vehicle. The wire needs to be as thick as possible-.
- Bond the antenna mount directly to bare metal on the vehicle frame or body. Remove paint or coating before making grounding connections-.
- Use short, wide braided copper ground straps between vehicle panels for RF bonding. Avoid thin automotive wire for RF grounding — it has high RF impedance-.
- If you’re mounting on a fiberglass or non-metal surface, you’ll need a “no-ground-plane” antenna or an artificial ground plane made of copper or steel screening grounded to the vehicle chassis.
Connect the Coax to the Radio
Once the antenna is mounted and grounded, connect the antenna cable plug to the receptacle marked “ANT” on the back of the unit-. Ensure the connection is snug — a loose coax connection is one of the most common causes of poor performance.
Step 6: Test and Tune Your SWR
This is the final and most critical step. SWR (Standing Wave Ratio) measures how efficiently your antenna system is transferring power. If your SWR is too high, you risk damaging your radio and you’ll experience poor range.
How to Tune Your SWR
Setup: Connect an inline SWR meter between the radio and antenna, as close to the CB as possible-.
Step 1 — Calibrate on Channel 1: Set the meter to “FWD” (forward power). Press the transmit button on the microphone and adjust the calibrate knob so the needle goes to the CAL marker-.
Step 2 — Take readings on Channel 1 and Channel 40: While holding the transmit button, switch the meter to “REF” (reflected) and read the SWR. Do the same on Channel 40-.
Step 3 — Adjust the antenna:
- If Channel 1 reads higher than Channel 40, your antenna is too short — lengthen it.
- If Channel 40 reads higher than Channel 1, your antenna is too long — shorten it.
Target: 1.5:1 or lower is ideal. Stay under 3:1.
Built-In SWR Protection
If you’re using the LUITON LT-8001PRO, the radio includes built-in SWR protection, which means it will alert you to antenna problems before they cause damage-. This is a significant advantage for first-time installers who may not have an external SWR meter on hand.
Common Installation Mistakes to Avoid
Even experienced installers make these mistakes. Here are the most common ones and how to avoid them:
- Antenna not tuned to the vehicle. This is the number one cause of poor CB performance-. Always tune your SWR after installation.
- Mounting location chosen for convenience over effectiveness. Aesthetics should be secondary to performance. The center of the roof is ideal for range-.
- Low-quality or pinched coax cable. Coax that’s worn, wrong length, or severely pinched will degrade your signal. Quality cable matters-.
- No ground plane for the antenna. Standard CB antennas require a metal surface to work properly. Without a ground plane, your range will suffer dramatically-.
- Running power wires alongside other harnesses. This introduces noise into your CB audio. Always run dedicated power wires away from vehicle harnesses-.
- Not checking connections regularly. Vibration from driving can loosen coax connectors and power wires over time. Check them every few weeks.
Maintenance Tips for Long-Term Performance
A well-installed CB radio is a reliable piece of gear, but it still needs occasional attention:
- Visually inspect your antenna every few weeks for bends, breaks, or loosened connections.
- Check for frayed or overheating wires. Look for signs of wear on the power and coax cables.
- Keep vents clear and dust off the radio. Good airflow prevents overheating.
- Check your fuses. Make sure they’re the correct size for your radio. An incorrect fuse can cause electrical problems.
Abschließende Gedanken
Installing a mobile CB radio is a rewarding DIY project that takes just a few hours and basic tools. The key is to plan before you drill, run dedicated power from the battery, ground your antenna properly, and always tune your SWR before you start transmitting.
If you’re ready to get started, browse our full lineup of mobile CB radios and antennas at bestcbradio.com/shop. The LUITON LT-8001PRO is an excellent choice for a feature-packed mobile setup, while the Quansheng UV-K5 makes a perfect companion handheld for when you’re away from the vehicle.
Have questions about your installation? Drop a comment below or reach out to our team — we’re here to help you get on the air.